
Editor’s note: Originally the cover photo for this post was simply the painting “The Creation of Adam” by the ninja turtle that likes to party. However, while not too spicy for the Vatican, various medias social flagged it for nudity, so I photoshopped some blue jeans on our boy Adam so you wouldn’t be subjected to Renaissance schlong.
Damn it, did I go almost another year without a devlog? My manager (me) is really gonna have to talk to his unpaid employee (also me) about that.
Rest assured (or rest uncertain—shit’s fucked out there) that progress on Terror High continues slowly but steadily. (I was going to say it continues “apace”, but apparently “apace” actually means “swiftly”, which means I’ve probably been using that word incorrectly most of my life.)
Things are still going great with Godot, and while there aren’t any massive updates to share (yet), in honor of the God of Content™ I thought it might be interesting to share my current process for character creation.
As I mentioned in a previous log de dev, I moved to Make Human for my base human meshes because my 3D sculpting skills weren’t (and still aren’t quite) entirely up to the snuff standards I set for myself vis-à-vis the human face. (I am learning to pick my battles and will allow myself some slack on this rather than fighting hundreds of thousands of years of evolution that make us highly tuned at analyzing “faces what look right”.)
I did play around with a free trial for Reallusion’s Character Creator as well as Epic’s MetaHuman, and while both are impressive, Character Creator was a bit much for my current needs, and MetaHuman is tied to the Unreal engine. Make Human, on the other hand, has a permissive, open source license, making it a natural fit. (At the time of writing, Character Creator does offer a perpetual license, though, which is nice, and makes it a potential viable option for future projects.)
Using Make Human is pretty straightforward, and isn’t much different from a character creator you might encounter in something like a Bethesda game. Bigger eyes here, smaller nose there, make the lips wider, et cetera, and baby, you got yourself a human goin’. After I finesse my li’l digital humans into a spot I’m happy with, I import the generated model into Blender, and the real fun begins: Playing dress up and hairdresser!
Like creating the base mesh, I experimented with at least one other program for clothing, the industry standard Marvelous Designer. The cloth simulation was, indeed, marvelous, but the subscription pricing and the need to re-mesh everything afterward anyway turned me off pursuing it further. So I did what I usually do: Try again. Fail again. Fail better.
Here’s the workflow I’ve landed on.
I construct the clothing for my characters much like you would if you were sewing a real garment. I start with finding an appropriate sewing pattern online and importing it as reference into Blender. From there, I’ll create a plane, subdivide it so it has a moderate amount of polygons (10-15 subdivisions usually looks about right), and then delete large, unneeded sections. (I originally tried constructing the patterns by creating an outline with vertices, but making sure there were an appropriate number of vertices to make a nice, even quad grid tripped me up enough times that starting with a grid helped eliminate that headache.)
I’ll then finesse the remaining outline into shape, with varying amounts of proportional editing, before smoothing out the interior vertices with the sculpt tool as much as is necessary. I generally model the major pieces of the pattern separately, but some things like shirt cuffs aren’t really necessary to model separately.
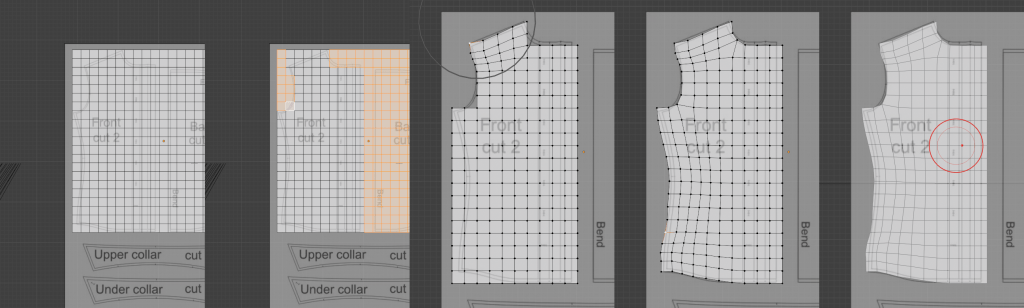
Once I’m happy with the pieces of the pattern, I’ll UV unwrap and “sew” the pieces together (i.e. connecting the individual vertices on either side of an edge without creating a face) as necessary in preparation for moving on to cloth simulation.
I’ve been able to get good results with Blender’s cloth simulation, but it often takes some trial and error. Sometimes it’s about tweaking the simulation settings, sometimes it’s about altering the pattern to better fit the model, sometimes it’s about sewing together sections in pieces rather than all in one go. (Shirt collars especially seem to be a part especially that has to be simulated or modeled separately.)
(Again, you could probably do this quicker with an industry standard like Marvelous Designer, but fuck it, I’m stubborn and I hate subscription models. If you’re not gonna be FOSS, at least let me pay for a perpetual license, you dinks.)
Once the simulation is in a good place, I bake the results, and use a Weld modifier and manual merging to make sure all the seams are “sewn” together, and merge the pieces into a solid whole. (This is, however, a “destructive” workflow, so I always duplicate and save the original patterns before proceeding.)
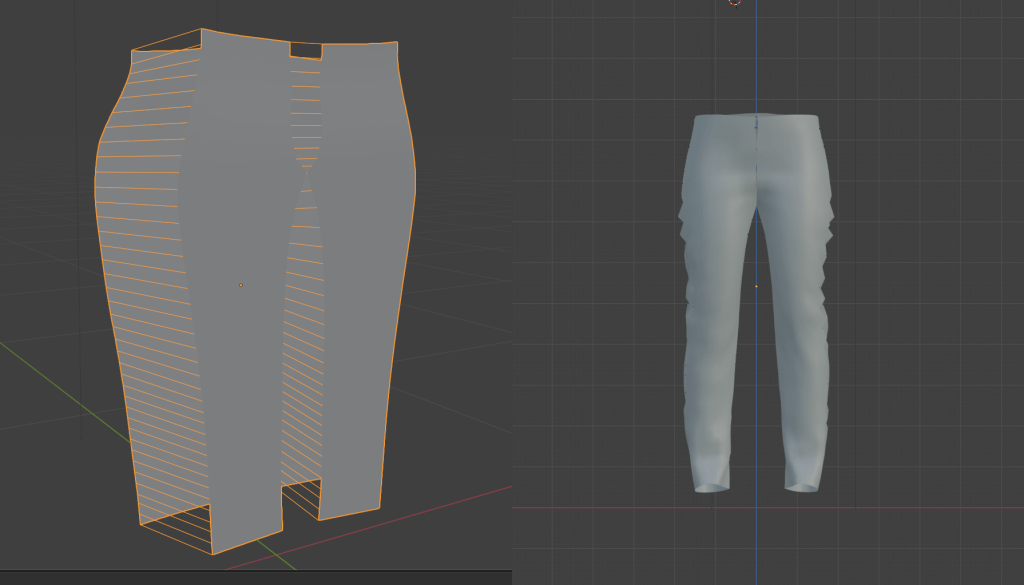
Texturing is pretty easy, owing to the fact that I UV unwrapped everything before I started mucking about with the simulation, so it’s essentially like I’ve cut the pattern pieces out of a larger piece of cloth, just like a proper seamster and everything!

While the cloth sim provides a nice base, I like to up the detail by duplicating the mesh, applying a subdivision modifier, and sculpting in some wrinkles that are later baked into a normal map I can use on the lower-poly mesh.

Shoes, backpacks, and other accessories are pretty much just straight forward modeling tasks, so I won’t go over that in much detail, except to say that I found this shoelace generator extremely useful. (I did try various ways of modeling them manually, but for a detail that realistically is almost never going to show up on screen it made sense to help automate this, and with better results to boot.) (Pun, for once, not intended.)

If all that sounds like a pain in the ass—and it kind of is if fiddly details aren’t your bag, baby—welcome to gamedev! But I haven’t even touched on creating hairstyles for characters, which I’ve found to be so fiddly they could challenge Satan to a musical duel.
The problem, for me at least, is that hair is incredibly organic. It’s hard for me to slowly and meticulously be random and organic, a problem that I imagine others face as well. (Again, humans are pattern-seekers, so we’re fighting that dang ol’ evolution again.)
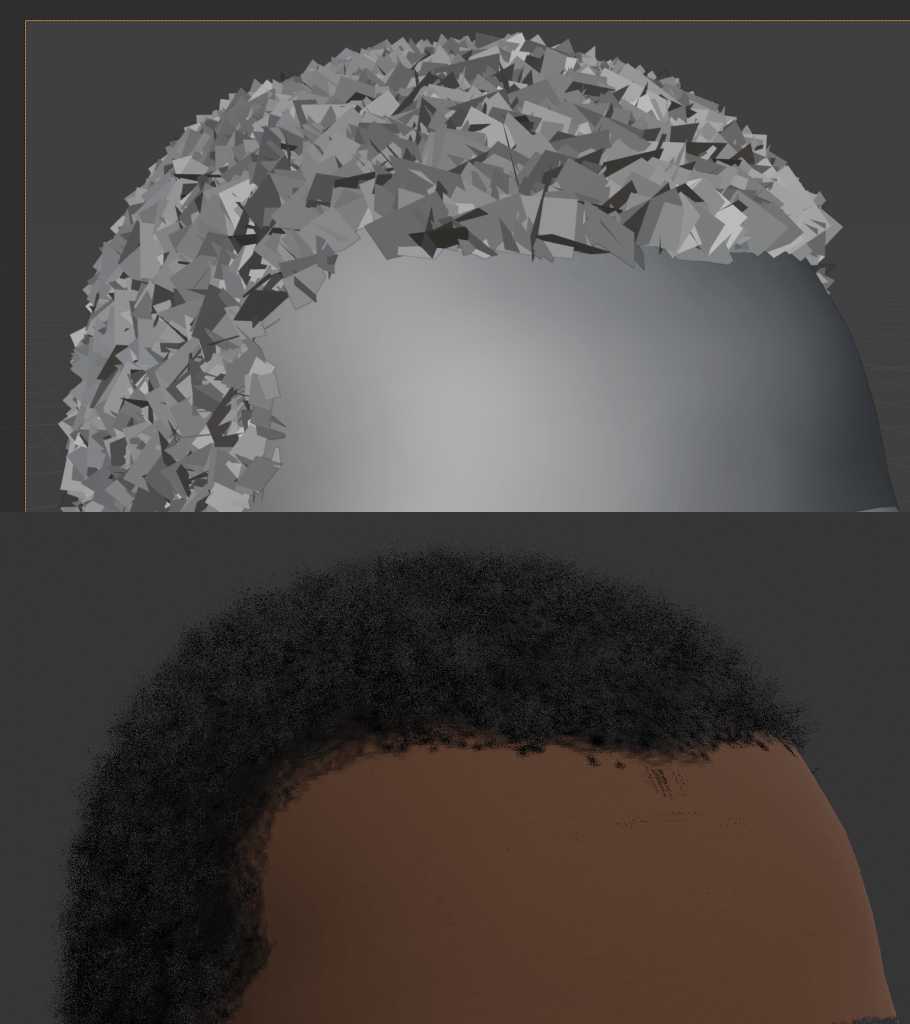
For Malcolm, a young first generation Nigerian American with short, type 4 hair, I found good results with using Blender’s particle system to spawn and randomly size and orient hair cards, so I didn’t have to worry about placing them manually and accidentally introducing any order. (This technique might also be useful for longer short hair, but I haven’t had the opportunity to play around with that yet.)
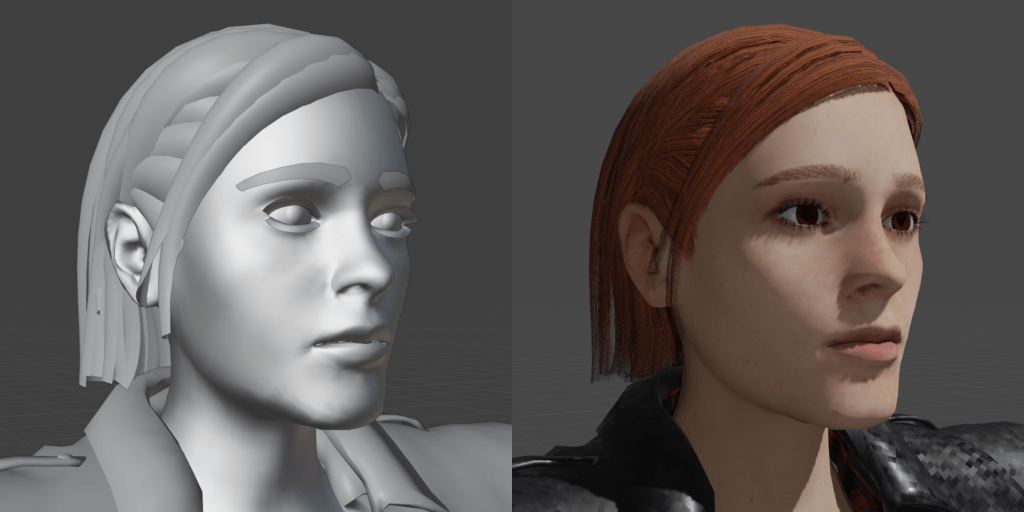
For longer hair, however, I found myself banging my head against a lot of different methods and various add-ons that never quite arrived at the results or workflow I was looking for. That is, until I found this tutorial by YouTuber PixelicaCG where it finally seemed to click.
That tutorial will do a better job of explaining it than I will, but it essentially boils down to modeling long strands of hair with curves that can then be converted to a simplified mesh with a hair texture (commonly referred to as a “hair card”). For real-time hair (such as you need for video games), this is a lot more performant than trying to use a particle system to generate each strand of hair, because getting enough scalp coverage to look good would simply be impractical (and unnecessary) for our current generation of rendering.
This still runs up against the struggle of accidental human-imposed order, but with curves being non-destructive and easily tweaked, you can both take your time and introduce randomness as needed before you commit to converting it to a mesh. (And, as with the clothing patterns earlier, I still keep the curves around, just in case I need to go back.)
As with all of these techniques, practice makes…if not perfect, then at least more gooder. (And I’m still puzzling out a good work flow for skin textures, but that’ll be a post for another day.)
But also, just look at how much my li’l Punky Brewster has grown!

And people say there’s no such thing as progress.
I don’t know if any of that was of interest to or made sense to the layperson, but a this point I’ve written it and you’ve read it, so our time has already been spent—perhaps even wasted—never to be returned to us in this one short, fleeting life.
Ain’t that just the way?
