Remember last devlog (only an uncharacteristically short two weeks ago!) where I said I was still working out a good workflow for skin textures? Well, surprisingly…it seems like I maybe kinda sorta already found one?
The caveat, of course, is that this is the workflow at least until something better comes along—but honestly, I’m surprised at how smoothly it came together given the other difficulties encountered in character creation. It all started, as such things often do, out of stubbornness. For the approval of the Midnight Society, I call this devlog…
Okay, so the stubbornness technically came a little later. It actually started by gathering reference materials and researching other artists’ workflows, seeing what tools and techniques they used.
Before even getting to creating the albedo1 texture for the skin, I knew part of capturing the details of skin would be to…well, add the details of skin. Using a technique similar to the one I described for adding detail to clothing, I duplicated the character’s base mesh and then added and applied a subdivision surface modifier. This gives us a ridiculous amount of polygons to work with (for the character in this article, the model went from ~9K faces to ~9 million); unrealistic for realtime rendering in a video game, but great for sculpting fine details.

Using a variety of sculpting brushes within Blender, we can can create a lot of those subtle details that sell the illusion of realism, such as pores, fine lines, and wrinkles. Once we’ve got our high resolution model to our liking, we bake the detail into a normal map that can then be used by our lower resolution base mesh.

This would prove the more painless part of the process.
For the texture itself, many tutorials focused on utilizing existing free or paid assets, such as those from 3D Scan Store or TexturingXYZ, and while using pre-built assets is all well and good, I usually shy away from them for several reasons. Firstly, I generally want full control over the final look and feel of the finished piece, largely for conformity with existing assets and their accompanying art style. Secondly, I find it’s important to be able to customize them as necessary; it’s much harder to tweak something to your liking at the final step if you don’t know what happened in the first twenty. Lastly, where’s the fun in buying a thing when you could make the thing?
Luckily, many artists were also sharing their workflows for hand painting textures from scratch (such as this one from YouTuber Jared Chavez, which proved invaluable to my eventual workflow), so I did have some guidance to go off of. Unfortunately, most of these workflows relied on industry standard Substance Painter (along with its Substance compatriots, Designer and Modeler), which I do not have.
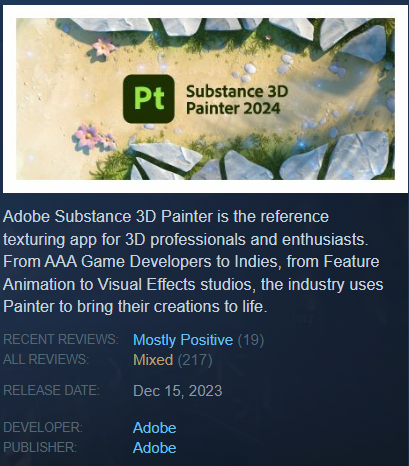
Originally developed by French software company Allegorithmic, in 2019 they were acquired by Omni Consumer Products—sorry, I mean Adobe, Inc.—folding its Substance wares into Adobe’s gaping maw. The Substances, however, are not a part of Adobe’s Creative Cloud suite and require an additional subscription. For individuals, this cost is (at the time of writing) $49.99 United States Dollars. (There is a perpetual license option available through Steam, with each program costing a not-entirely-unreasonable two-hundo, but reviews for these versions are quite literally mixed, citing compatibility issues and a lack of assets available in the subscription version.)
Furthermore, as more and more of the programs we use and the media we engage with and the cars we drive switch to relying on subscription-based models with ever-increasing costs—designed, it seems, to keep us suckling on their teat and bleeding us dry—it feels hard to justify yet another subscription cost unless you’re going to be using it constantly in a professional setting (ideally with a studio footing the bill). It’s even harder to justify as a part-time indie developer, no matter how good the software.
(To be clear, this critique of subscriptions is aimed at corporations—who already have more money than god and are more concerned with stonks and line go up than, god forbid, letting us own a product—and not, say, wonderful independent, worker-owned, reader-supported websites like Aftermath or supporting individual artists on Patreon, to whom I’m more than happy to throw some spare woolongs towards a subscription.)
I researched alternatives, and some seemed promising (most notably Armor Paint), but as per usual, I decided I was gonna brute force it with my main man Blender.
And brute force it I did, Terrorteers—with surprisingly little force and even less brute!
Seeking to recreate at least some of the functionality of Substance Painter, I at first started simply by painting textures using Blender’s existing texture painting workflow. This involved using textures and texture masks as brushes to add organicity (surprisingly, a real word!), and adding new layers and manually mixing them in-shader as necessary.
These first tests technically worked, but quickly grew tedious with each additional layer, and if you want to make organic-looking skin (oh man, is there another word I can use here besides organic? I already feel weird talking so much about skin), you’re probably going to want to use a lot of layers. Luckily, I found a free Blender extension by the name of ucupaint, which adds an easy-to-use UI for automating the tedious parts of layer-based painting in Blender.
I think the walkthrough from Jared Chavez I linked earlier does a better job of explaining it, but for anyone curious to how I adapted the process from Substance Painter to Blender, here’s Wot I Did:
Each layer was created and painted in 4K, allowing for more subtle details to accumulate before baking the final texture at a lower resolution. I started with a subdermal base level of red, with yellow as the secondary base, and blue in select areas such as around the eyes, lips, and chin. These all used the basic “Mix” blend type, layering one on top of the other without additional wizardry. This was followed by an epidermal base layer of the main skin tone, which was embellished and evened out with a solid layer using the “Add” blend type. (I actually encountered a happy accident with the base epidermal layer; when I made the Blender brush, using a pack of dirt brushes from DeviantArt user hellostreetlight, I accidentally used the texture as both a texture mask and a texture, when I had originally intended only the former. What this meant was that both the opacity of the brush, as well as the texture painted by the brush, were affected. This resulted in a mottled look which actually ended up benefiting the realistic, subtle variations I was attempting to achieve.) (I would, however, use a corrected brush later on in the process to even things out.)
Once the base was established, details like freckles and makeup could be added, eventually baking all the 4K layers into the final 1K texture.
On top of that, both the Principled BSDF shader in Blender and the StandardMaterial3D in Godot can enable subsurface scattering, which mimics the way light bounces through thinner parts of skin, adding another layer of realism.
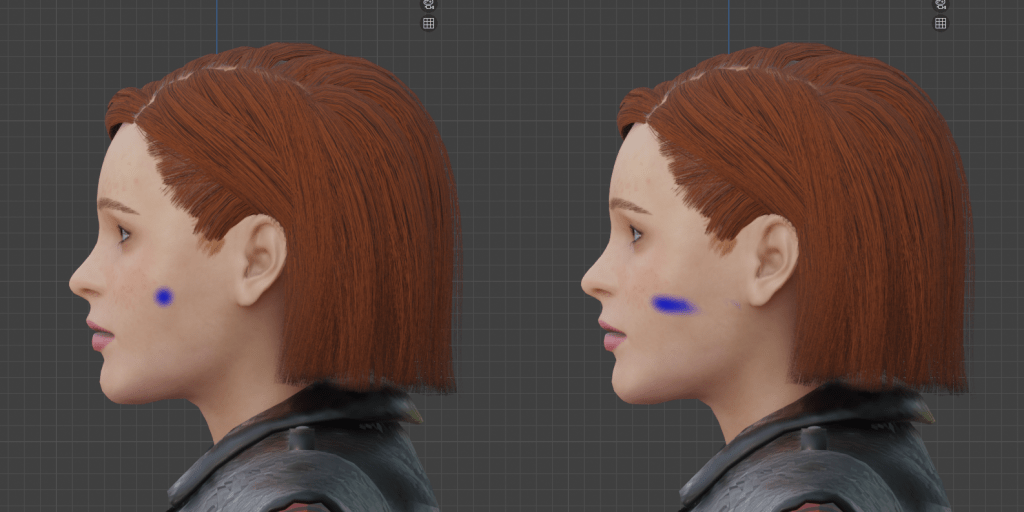
We can also add some subtle variations by creating a roughness texture, telling the shader which parts of the skin are rougher and which are smoother. Certain areas such as lips and the inside of the eyelids will be more apparent, but we can also add a little more smoothness to areas like the forehead and the bridge of the nose where skin is usually a little oilier as you can see below:
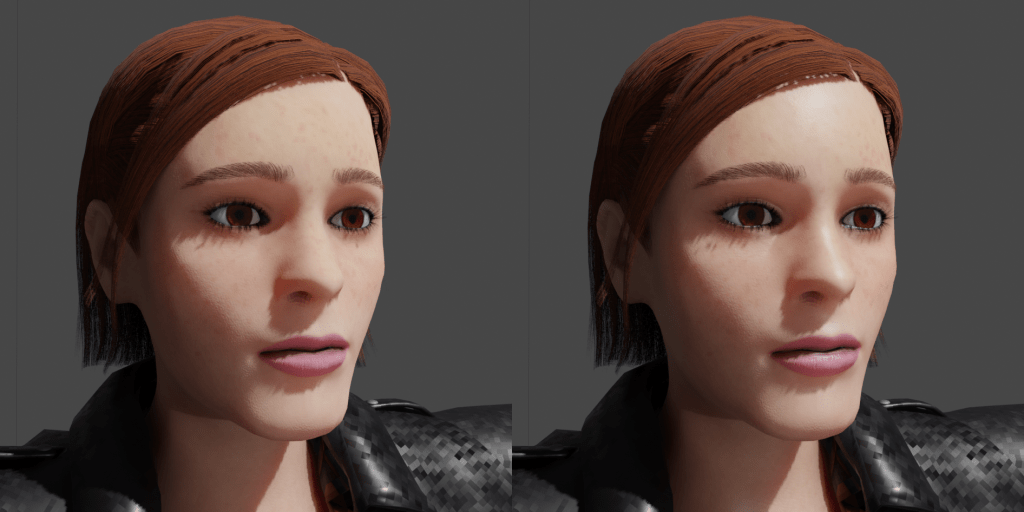
It’s a subtle difference, but as with all of the subtleties that came before, they add up.
After figuring out all the steps, Blender proved a more than competent alternative to Substance Painter for my needs—but it’s not without its quirks. The main issue I encountered is that texture painting in Blender, unlike sculpting, is based on a projection instead of aligning the brush with the model’s faces. This meant being careful to mostly texture paint head on, lest the texture be distorted and stretched across all the visible faces, as seen below:
But if you’re willing to put up with some quirks, you can get some really incredible results for next to nothing. The only monetary expenditure for this was the sculpting brushes, which I was happy to purchase for a cool $15. If my math is correct, that is approximately a…hmm, lemme see, carry the one…shit ton cheaper than even a perpetual license for Substance Painter, let alone the costs a subscription could eat up over time.
Now how’s that for a slice of fried gold?2
- Sometimes called a diffuse texture, it’s basically just your base color before any of the fancy PBR (physically-based rendering, not Pabst Blue Ribbon) bells and whistles like metallic, roughness, or normal maps get applied. ↩︎
- I was gonna make a joke about “it puts the lotion on its skin or else it gets the hose again” to close out this article, but then I looked up a clip from “The Silence of the Lambs” to link to, having not seen it in close to twenty years, and uhhhhhh is it just me or is that shit hell of transphobic? (Oh well, “Goodbye Horses” is still a banger and Mads Mikkelsen is the best Hannibal, anyway.) ↩︎

Leave a comment